
Installing Wallboard
This is an excerpt from the Book called “Carpentry “ by Des Moines, Iowa. Continue reading to learn more about Installing Wallboard, thanks to the author.
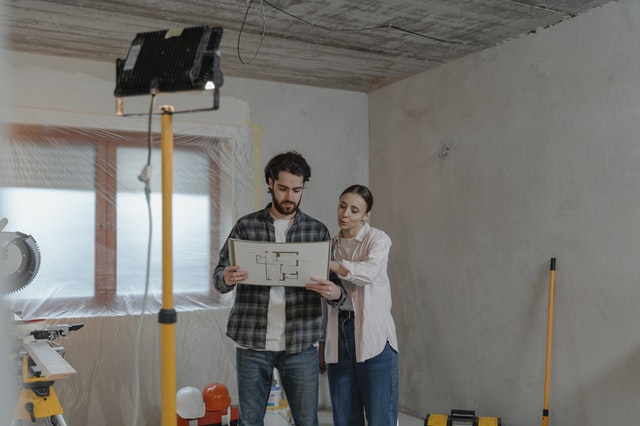
Thank goodness for wallboard, which makes it possible for a do-it-yourselfer to finish walls without spending a year or so learning how to plaster. But it’s still dusty, difficult, sweaty work, involving heavy lifting in awkward positions.
Planning The Job
Though hanging the sheets is heavy work, taping takes much more time. Gaps are difficult to tape, so take the extra time to cut accurately and to position the sheets tightly together.
Hang the ceiling sheets first, then the wall sheets. A rented wallboard jack (or hoist), will make the work easier and the seams tighter. It raises sheets, allowing you to position them carefully.
Using 10-foot or even 12-foot sheets is worth the extra trouble if you can avoid butt joints, which are the most difficult joints to tape. Use ½ inch wallboard for the ceiling. Consider using ⅝-inch sheets for the walls. It’s harder to lift so you may need jamb extensions, but the wall will be significantly more solid.
New Construction: Inspect the framing to make sure you will have nailing surfaces for the ends of all your sheets. You may need to add nailers at inside corners. If only half a stud’s thickness is available for nailing in a corner, plan to install against that stud first if you nail to the adjoining wall first, you will lose ½ inch of your nailing surface.
Over Old Walls: If your plaster walls and ceiling are cracked and spongy, you can “skin over” them with ½–inch wallboard on the ceiling ¼-inch wallboard on the walls. (If you use ¼-inch wallboard on the ceiling, it may eventually sag.) To skin over walls, you will need to remove all moldings; butting the wallboard up to molding is difficult and produces a sloppy appearance. Before you replace the moldings, cut baseboard pieces and provide jamb extensions for the casing.
Another option is to remove only the moldings and plaster, leaving the lath in place. Depending on the thickness of the plaster, install ⅜-inch or ½-inch wallboard. Removing plaster is messy and difficult, but the finished wall will be very strong and you won’t have to modify moldings.
When skinning over or attaching to lath, sheet ends do not have meet on centers of studs or joist edges; attach them to the lath with screws ( not nails), and apply adhesive.
Measuring And Cutting
Few things are more frustrating than missing a stud or joist while struggling to hold a heavy piece of wallboard. Take a minute or two to mark locations on the sheets. If you framing members are 16 inches apart, use a wallboard square (which has crosspieces 16 inches long on one side) to quickly make a series of pencil lines.
When cutting wallboard to length, cut the wallboard ¼ inch shorter than the measurement calls for; this compensates for the somewhat ragged edge of the cut. To make a square crosscut, make only one measurement mark. Hold the drywall square in place with your foot against the bottom, and score through the paper. Bend the cut piece back, and cut through the paper on the other side. For a rip cut parallel to the edge of a sheet, use the drywall square to measure and as a guide (above right). For rip cuts not parallel to edge, measure each end and chalk, a line between; cut freehand.
Make cutouts for electrical boxes ¼ inch larger than the boxes. With a tape measure or drywall square, mark the two dimensions in one direction, and then in the other direction, and draw a rectangle. Cut out the opening with a drywall saw or a knife (right). To cut circles for pipes, measure to the center of the hole only, and use a circle cutter. Cut on both sides, and bang the hole out.
Vertical Or Horizontal?
Installing sheets with the tapered joints running up and down will mean that you avoid butt joints, which are very bothersome. However, it can be difficult to line up the edges so that they meet at the center of a stud (or “splitting the stud”) all along their length.
Running the sheets horizontally may require butt joints, but it will be easier to split on studs. And, the horizontal tapered joints will be easier to tape than vertical joints running from floor to ceiling.
Installing Wallboard
Hanging The Sheets
Wallboard sheets have tapered edges along their sides. When a tapered edge is butted against a tapered edge, the resulting joint is easy to tape and will not bulge out. When sheets are butted end to end, however, that joint will take time and will never be truly straight. So don’t economize by using cut pieces of wallboard if it results in more butt joints. The material is cheap, after all.
Correct Fastening: A fastener’s head must be driven below the face of the sheet, but not so far that it breaks the paper. Even a slightly protruding head is impossible to smooth over. And, if the paper is broken, a fastener is nearly useless.
Use a drywall hammer for nails. It is light and has a wider head that makes it easy to dimple the nails without harming the paper. Use a wallboard shooter to fasten screws. It’s a drill that you can adjust to the depth you want. Or, buy a dimpling but, which you can put on a regular drill and is nearly as effective.
Fasteners that do not grab wood will work themselves out in time. If you miss a stud or joist completely, remove the fastener and try again. If the fastener barely catches the side of the stud, angle-drive another fastener next to it and directly into the wood, to hold the first one in place.
Building codes have varying regulations concerning how many fasteners to use. To be safe, space nails or screws 7 inches apart on the ceiling and 8 inches apart on the ceiling and 8 inches apart on the wall. If you use wallboard adhesive, you’ll need fewer fasteners.
Attaching To The Ceiling: If you’re not using a wallboard jack, at least have a helper, some solid scaffolding, and a T-brace made of 2×4s that can hold up part of a sheet temporarily. Wear a hat with a sponge in it to lessen the head and neck strain caused by holding up sheets with your head while you nail.
Start in a corner with a full sheet, if possible. With a helper, raise the sheet and place it fairly tight to the walls. Drive 10 or 12 fasteners, and move on to the next sheet; go back and install the rest of the fasteners after all the sheets are up.

Attaching To Walls: To run the pieces horizontally, hang the top pieces first. Butt them tightly against the ceiling sheets. Avoid butt joints at doors and windows; cut the sheet out instead. For the bottom horizontal sheet, or if you are installing vertically, use a roll lifter (or fulcrum) to raise it so it butts tightly to the top piece.
Taping
For this job, use 6-inch, 8-inch, and 12-inch taping blades, and a corner blade. Maximize strength by using dry-mixed joint compound for the first coat and ready-mixed compound for the following coats. You may want to scoop compound into a special tray, or simply hold a dollop of compound on the 12-inch blade and scrape it off with the 8-incher.
Clean your tools often and keep the lid on the joint compound because small pieces of dried compound will make it difficult to get a smooth surface. For all joints, you will need at least three coats of compound. Allow each coat to dry, and sand away any protrusions before applying the next coat.
Nail Or Screws?
When wallboard comes loose, it is usually because the paper is damaged, and rarely because the fastener has come loose. So nails are just as effective as screws. But many prefer the clean holes left by driving a screw with a dimpling bit.
Paper Or Mesh?
Mesh tape is easy to install, but it isn’t as rigid as paper. Apply mesh tape to tapered and butt joints; because you don’t have to lay down compound first, the taping will not be as thick. Use paper tape at inside corners. The tape will help define the corner, and it will not fray if you scrape the trowel against it, as mesh tape is likely to do.
Nail Holes And Tapered Joints: These are the easiest sections to tape. Press mesh tape into all tapered joints, using continuous pieces wherever possible. Spread a smooth coat of compound over the tape with the 8-inch blade. Fill in only the valley made by the tapers, so a flat surface stretches across the joint. Fill each nail hole with two strokes of a 6 or 8-inch trowel. The first stroke pushes the compound into the joint, and the second scrapes it away.
Butt Joints: These are more difficult because the edge of the wallboard is not indented. Apply mesh to the joint, and feather the compound out 6 inches or more on either side, taking care not to scratch the tape. Feather out farther with each successive coat.
Outside Corners: Cut a piece of metal corner bead with tin snips. Hold the bead gently against the corner-don’t press-and drive nails or screws on both sides. Check that the bead’s flange and the fastener heads don’t protrude; run a taping blade along each side. Apply the first coat with a 6-inch blade, then an 8-inch blade, then use a 12-incher.
Inside Corners: This is the most difficult. Apply a bed of compound with no gaps, using a corner trowel. Immediately embed paper tape in the compound. If you get wrinkles or bubbles, lift, insert more compound, and reapply. Use a corner trowel and a 6-inch blade to apply coats of compound over the tape.
