
If you want some home improvement projects to do during summer we have few ideas jotted down in this article. This article is an excerpt from the book called “California Home Landscaping” by “Roger Holmes & Lance Walheim”
Fences, Arbors, and Trellises
Novices who have no trouble tackling a simple flagstone path often get nervous when it comes time to erect a fence, an arbor, or even a trellis. While such projects can require more skill and resources than others in the landscape, the ones in this book have been designed with less-than-confident do-it-yourself builders in mind. The designs are simple, the materials are readily available, and the tools and skills will be familiar to anyone accustomed to ordinary home maintenance.
First, we’ll introduce you to the materials and tools needed for the projects. Then we’ll present the small number of basic operations you’ll employ when building them. Finally, we’ll provide drawings and comments on each of the projects.
Materials
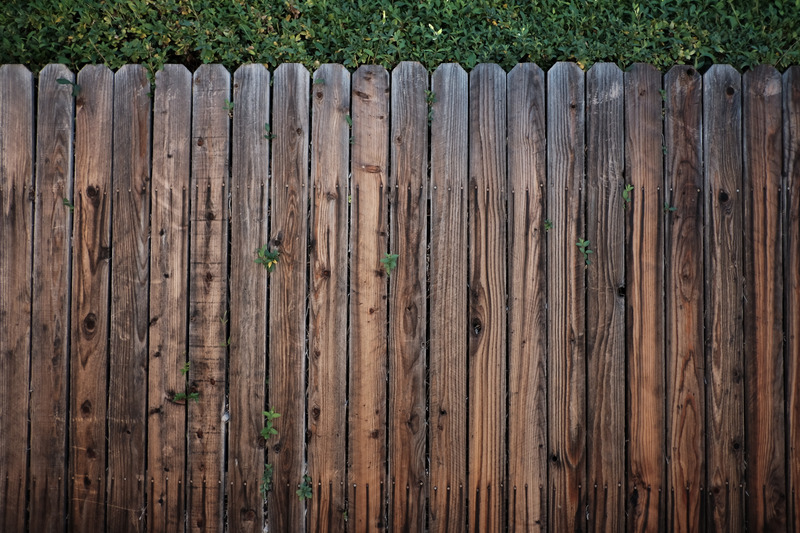
Of the materials offering strength, durability, and attractiveness in outdoor settings, wood is the easiest to work and affords the quickest results. While almost all commercially available lumber is strong enough for landscape structures, most types decay quickly when in prolonged contact with soil and water. Cedar and redwood, however, contain natural preservatives and are excellent for landscape use. Alternatively, a range of softwoods (such as pine, fir, and hemlock) are pressure-treated with preservatives and will last for many years. Parts of structures that do not come in contact with soil or are not continually wet can be made of ordinary construction-grade lumber, but unless they’re regularly painted, they will not last as long as treated or naturally decay-resistant material.
In addition to dimension lumber, landscape structures often incorporate lattice, which is thin wooden strips crisscrossed to form patterns of diamonds of squares. Pre-made lattice is widely available in sheets 4 ft .by 8 ft. and smaller. Lattice comes in decay-resistant woods as well as in treated and untreated softwoods. The strips are typically from 1/8 to 3/8 in. thick and about 11/2 in. wide, overlapped to form squares ranging from 1 to 3 in. or more on aside. Local supplies vary, and you may find lattice made of thicker or narrower material. Lattice can be tricky to cut; if you’re uneasy about this task, many suppliers will cut it for you for a small fee.
Fasteners
For millennia, even basic structures such as these would have been assembled with complicated joints, the cutting and fitting of which required long training to master. Today, with simple nailed, bolted, or screwed joints, a few hours’ practices swinging a hammer or wielding a cordless electric screwdriver is all the training necessary.
All these structures can be assembled entirely with nails. But screws are stronger and, if you have a cordless screwdriver, make assembly easier. Buy common or box nails (both have flat heads) hot-dipped galvanized to prevent rust. Self-tapping screws (“deck” screws) require no pilot holes. For rust resistance, buy galvanized screws or screws treated with zinc dichromate.
Galvanized metal connectors are available to reinforce the joint used in these projects. For novice builders, connectors are a great help in aligning parts and making assembly easier. (Correctly fastened with nails or screws, the joints are strong enough without connectors.)
Finishes
Cedar and redwood are handsome when left unfinished to weather, when treated with clear or colored stains, or when painted. Pressure-treated lumber is best painted or stained to mask the greenish cast of the preservatives; weathered it turns a rather unattractive gray-green.
Outdoor stains are becoming increasingly popular. Clear or lightly tinted stains can preserve or enhance the rich reddish browns of cedar and redwood. Stains also come in a range of colors that can be used like paint. Because they penetrate the wood rather than forming a film, stains don’t form an opaque surface-you’ll still need paint to make a picket fence white. On the other hand, stains won’t peel or chip like paint and are therefore easier to touch up and refinish.
When choosing a finish, take account of what plants are growing on or near the structure. It’s a lot of work to remove yards of vines from a trellis or squeeze between a large shrub and a fence to repaint; consider an unfinished decay-resistant wood or an initial stain that you allow to weather.
Tools
Even the least-handy homeowner is likely to have most of the tools needed for these projects: claw hammer, crosscut handsaw, brace-and –bit or electric drill, adjustable wrench, combination square, tape measure, carpenter’s level, and sawhorses. You may even have Grandpa’s old posthole digger. Many will have a handheld power circular saw, which makes faster (though noisier) work of cutting parts to length.
A cordless drill/ screwdriver is invaluable if you’re substituting screws for nails. If you have more than a few holes to dig, consider renting a gas-powered posthole digger. A 12-in-diameter hole will serve for 4×4 posts; if possible, get a larger-diameter digger for 6×6 posts.
Setting Posts
Most of the projects are anchored by firmly set, vertical posts. In general, the taller the structure, the deeper the post should be set. Arbor posts should be at least 3 ft. deep. Corner and end posts of fences up to 6 ft. tall and posts supporting gates should also be 3 ft. deep. Intermediate fence posts can be set 2 ft. deep.
The length of the posts you buy depends, of course, on the depth at which they are the seat and their finished heights. When calculating lengths of arbor posts, remember that the tops of the posts must be level. The easiest method of achieving this is to cut the posts to length after installation. For example, buy 12-ft. posts for an arbor finishing at 8 ft. above grade and set 3 ft. in the ground. The convenience is worth the expense of the foot or so you cut off. The site and personal preference can determine whether you cut fence posts to length after installation or buy them cut to length and add or remove fill from the bottom of the hole to position them at the correct heights.
We at Skyline Drywall repair in Washington DC, offers all home improvement services. Some of our interests are listed here.
Continue reading our next article on Patios and Decks in Landscape Planning