
Modern Drywall Trends You’ll Love – Cleaner, Greener, and Built to Last

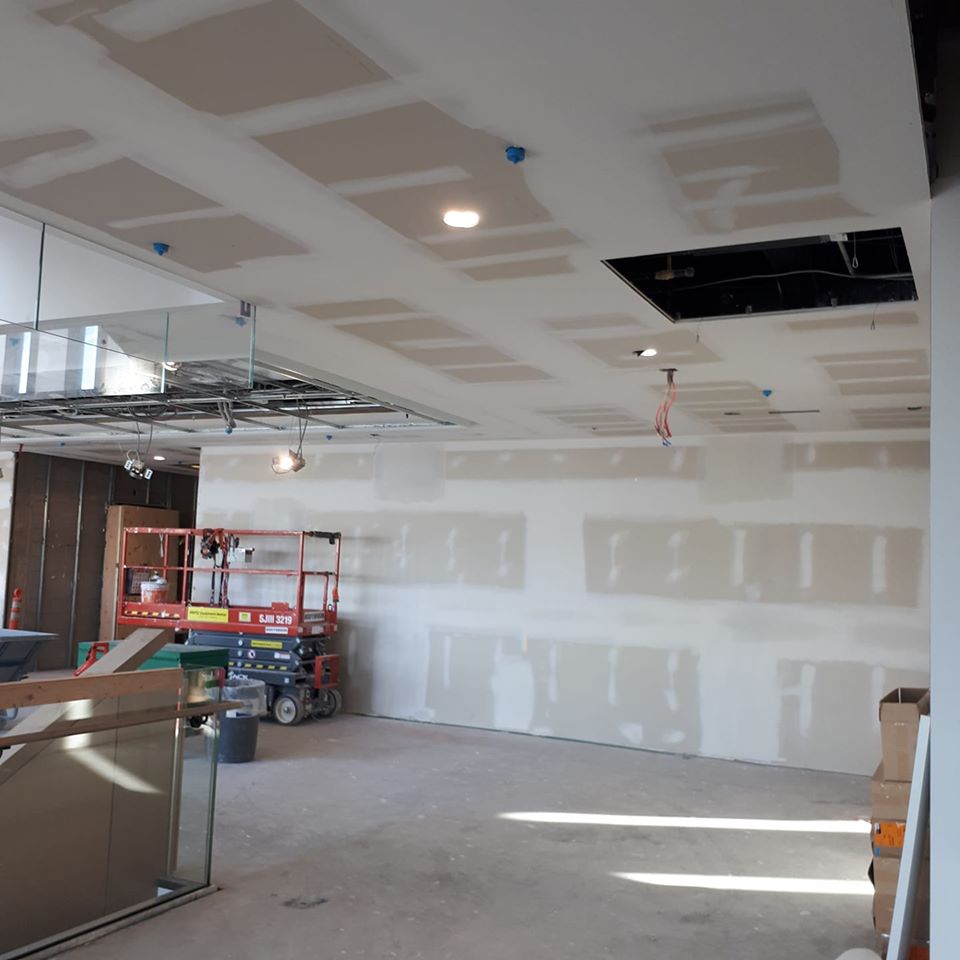
Homeowners are rethinking what makes a house truly modern. It’s not just about stylish furniture or open floor plans anymore — it’s also about what’s behind the walls. Drywall, once the most overlooked material in home construction, is now at the heart of innovation. At Skyline Drywall Repair Service we’ve seen firsthand how drywall is evolving. The latest trends focus on cleaner materials, greener production methods, and longer-lasting performance. Whether you’re remodeling or repairing, these modern upgrades can make your home healthier, more efficient, and more beautiful for years to come. 1. Moisture-Resistant Drywall – A Must-Have for Modern Homes Water damage is one of the most common drywall problems. Even minor leaks or humidity can cause bubbling, sagging, and mold. That’s why one of the top trends in 2025 is moisture-resistant drywall, also known as green board or purple board. These boards are engineered to repel water and prevent mold growth making them ideal for bathrooms, basements, and kitchens. At Skyline Drywall Repair Service, we often replace old, damaged drywall with these upgraded materials that help homeowners avoid costly future repairs. Moisture-resistant drywall not only extends the life of your walls but also creates a cleaner indoor environment by reducing mold spores and allergens. 2. Sustainable Drywall – Building a Greener Future Sustainability is no longer optional it’s a standard in modern construction. Drywall manufacturers are now producing eco-friendly boards made with recycled gypsum, low-VOC binders, and minimal waste. These new materials reduce the carbon footprint of construction and make your home safer to live in. At Skyline Drywall Repair Service, we proudly use drywall products that are both durable and environmentally responsible. Eco-friendly drywall options also contribute to improved air quality and energy efficiency helping homeowners reduce monthly utility bills while supporting a greener planet. 3. Soundproof and Smart Walls Today’s drywall goes beyond aesthetics it’s about comfort and performance. One exciting innovation is soundproof drywall, which significantly reduces noise transfer between rooms. It’s perfect for home offices, nurseries, and entertainment rooms where quiet is essential. Some modern drywall systems even include smart coatings that fight bacteria and mold, or reflective finishes that improve lighting efficiency. These high-tech features help maintain a cleaner and brighter living space without the need for constant maintenance. When you work with Skyline Drywall Repair Service we help you select the right materials to meet your home’s needs and your design goals. 4. Durable Finishes and Easy Maintenance Durability is a major factor in today’s drywall trends. New products are designed to resist dents, scratches, and general wear a huge advantage for busy households. High-impact drywall is now being used in hallways, playrooms, and garages. These boards are stronger than standard drywall, making them perfect for high-traffic areas. Combined with moisture protection, they create walls that truly stand the test of time. And when minor damage does occur, Skyline Drywall Repair Service offers fast, flawless patching and texture-matching to make your walls look new again. 5. Minimalist Textures and Seamless Design Smooth, seamless walls are becoming the new standard in modern interior design. While heavy textures were popular in the past, today’s look is cleaner and more refined. Skim-coated finishes and ultra-smooth drywall applications are trending in 2025 because they create a timeless aesthetic and pair perfectly with any color palette. Our experts at Skyline Drywall Repair Service specialize in achieving those sleek, magazine-worthy finishes that elevate your home’s entire look. 6. Fire-Resistant Drywall for Added Safety Another growing trend is fire-resistant drywall, designed to provide extra protection in key areas like garages and utility rooms. These boards slow down the spread of flames and heat, giving families more time to respond during emergencies. Modern versions of fire-rated drywall are thinner, lighter, and easier to install than before — without compromising safety. It’s one of the smartest investments homeowners can make to improve both protection and peace of mind. 7. Eco-Conscious Installation and Repair Sustainability doesn’t stop at materials — it also includes how they’re installed. Skyline Drywall Repair Service uses efficient repair and installation methods that minimize waste and dust, ensuring a cleaner process from start to finish. We take pride in helping homeowners make eco-conscious choices that don’t just look good they last. From repairing cracks to replacing entire walls with moisture-resistant or recycled drywall, our team ensures every job supports a cleaner, greener home. The Future of Drywall: Smart, Sustainable, and Stylish The drywall of the future combines technology, design, and sustainability. As manufacturers continue developing smarter and cleaner products, homeowners can enjoy walls that are both beautiful and functional. By choosing moisture-resistant, soundproof, or sustainable drywall, you’re not just improving your home’s appearance — you’re investing in its long-term health and value. At Skyline Drywall Repair Service we stay ahead of these industry trends to give our clients the best results possible. From small patch repairs to full remodels, we use high-quality materials that reflect the future of drywall innovation. Ready to Modernize Your Walls? Whether you’re renovating, repairing, or upgrading, it’s the perfect time to bring your home up to date with modern drywall solutions that are cleaner, greener, and built to last.Let Skyline Drywall Repair Service transform your interiors with professional craftsmanship and eco-smart materials. Visit today to learn more or schedule your next drywall project.
When to Repair vs. Replace Your Drywall: What You Need to Know
Drywall is one of the most important parts of your home’s interior. It gives your walls a smooth finish, adds structure, and helps insulate your home. But over time, drywall can get damaged from moisture, cracks, dents, or general wear and tear. When that happens, homeowners often wonder — should I repair or replace my drywall? At Skyline Drywall Repair Service, we help homeowners across Washington DC, Arlington VA, Silver Spring MD, and nearby areas make the right choice. Here’s what you need to know to decide what’s best for your home. Understanding Drywall Damage Drywall damage can come from several causes — water leaks, humidity, foundation settling, or even everyday bumps and scrapes. Common issues include: Each problem requires a different approach. The key is understanding whether the wall’s structure is still sound or if deeper issues exist. When to Repair Your Drywall Repairing drywall is often faster, more affordable, and perfectly effective when the damage is minor or localized. 1. Small Holes and Cracks If you notice tiny holes or hairline cracks, a simple patch, sanding, and paint touch-up can make your wall look like new again. 2. Light Water Damage (Source Fixed) When a small leak or humidity issue has already been resolved, replacing just the affected section of drywall is usually enough. 3. Cosmetic or Surface Damage Scuffs, dents, and minor scratches can easily be filled, smoothed, and repainted without removing large sections. 4. Limited Area Damage If the problem is isolated — such as a doorknob hole or a small impact mark — repairing is the most practical and cost-effective solution. When to Replace Your Drywall Sometimes, drywall repair isn’t enough to solve the problem. In these cases, full replacement ensures better safety and appearance. 1. Extensive Water Damage When drywall becomes soft, warped, or saggy, the material has been compromised. Replacing it prevents future mold and structural issues. 2. Mold or Mildew Growth If mold has spread behind the drywall, it’s best to remove and replace it entirely. This eliminates health risks and prevents recurrence. 3. Large Holes or Deep Cracks If holes are several inches wide or cracks cover large areas, patching may not hold up well over time. Replacement gives a seamless and durable result. 4. Structural or Foundation Issues When damage is caused by ongoing foundation movement or settling, replacing drywall after addressing the root cause is the right approach. 5. Remodeling or Renovation If you’re updating insulation, adding wiring, or remodeling a room, replacing drywall ensures a clean, modern finish. Repair vs. Replace: How to Decide Here are a few key factors to help guide your choice: Professional Help Makes the Difference Choosing whether to repair or replace drywall isn’t always simple. A professional inspection can reveal hidden issues like moisture, mold, or weak spots. At Skyline Drywall Repair Service, our experts assess your walls, recommend the best solution, and provide seamless results that restore your home’s appearance. We handle everything — from small patches to complete drywall replacements — ensuring quality workmanship and long-lasting durability. Final Thoughts If your drywall has small cracks, dents, or minor stains, a repair can restore your wall quickly and affordably. But when you’re facing large holes, mold, or water damage, replacement is the safest and most effective option. No matter the size of the project, Skyline Drywall Repair Service delivers reliable, professional drywall repair and replacement for homeowners throughout Washington DC, Arlington VA, Silver Spring MD, and nearby areas. Smooth walls, lasting results, and peace of mind — that’s what Skyline stands for.

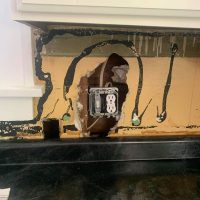
Preventing Drywall Damage: What Every Homeowner Should Know Skyline Drywall Repair Service, otherwise known as sheetrock or plasterboard, is the standard wall material used in most modern houses and apartments these days. The main reasons are that it’s affordable, easy to install, and allows you to create seamless, relatively durable wall surfaces throughout living spaces that can be painted, wallpapered, or textured however you prefer with relative ease. But while drywall is flexible and convenient for dividing up rooms, it can still get damaged pretty easily if you aren’t careful. And fixing dents, cracks, holes or water stains in drywall usually means bringing in professionals and rolling up your sleeves for some hassle and expense that could’ve been prevented quite easily. The good news is that there are common sense steps homeowners can take to prevent drywall damage. So here are the biggest tips for guarding your walls and ceilings to minimize damage issues down the road. A little bit of pro activity early on will save you headaches (and cash!) later. Use Corner Guards and Wall Padding One trick of the trade every homeowner should know about preventing drywall damages is the importance of Installing corner guards in high-traffic zones and foam or plastic wall padding as “bumpers” along hallways and entries. Doing so will help cushion inevitable contact from furniture, equipment, people, pets, and any other objects that may bump the walls. This shields vulnerable wall surfaces in a nearly invisible way from the most common dings, cracks, holes, and other signs of wear and tear. A smart and affordable choice that does the preventative work for you by absorbing impact. Keep Walls Dry Water is drywall’s worst enemy. From leaky roofs and pipes to overflowing showers, any excess moisture absorbed into drywall will start comprising its structural strength and integrity. Left alone, drywall water damage leads to bulging, crumbling, and eventually mold issues that require major cut-outs and repairs. So, stay vigilant for wet spots, respond ASAP to any leaks or flooding, and ensure any Skyline Drywall Repair Service near water sources like bathrooms remains properly ventilated to prevent condensation. Catching and resolving moisture sources quickly is key! Baby Those Walls It’s just a reality – walls need babying in family homes or else they get beat up fast. Remind kids not to kick, punch or throw objects at walls which puncture easily. Use appropriate supports and hangers for decor pieces and shelves so the weight doesn’t gradually crush drywall at the anchors. And when moving stuff around like furniture or appliances, avoid scraping and denting walls by padding corners and taking things slow and steady. Basically, handle walls with care as if they were a newborn infant! It’ll pay off for long-term prevention. Regular Inspections Make a habit of doing routine workarounds in all rooms scanning walls and ceilings up close for early signs of damage trouble emerging – cracked corners, bulging shapes, mold, split seams, etc. Issues can develop and worsen gradually over time out of eyesight, so consistent monitoring helps catch stuff before major repair needs set in. Rapid Repairs When Needed Despite best efforts, stuff happens! But the key for homeowners is addressing any drywall dings, holes and deteriorating spots right away before further crumbling occurs. For nail pops, bubbles and holes smaller than a few inches wide, basic patching kits can usually handle things. More serious gashes likely need boards fully replaced – nail in new drywall pieces after cutting back damage to wall studs, tape seams and skim coating for fresh finishes. The Bottom Line While you probably can’t prevent all drywall damage realistically, staying vigilant and proactively protecting vulnerable areas from moisture, traffic, etc will help your walls hold up better in family living spaces long-term. And make repairs swiftly – it saves bigger headaches down the road!
Bathroom Blocking
Bathroom Blocking Bathroom Blocking is a topic about planning the bathroom blocks like towel rack, closet shelves and safety bars. This article is an excerpt from the book called “How to build a house” by “Larry Haun” BLOCKING IN BATHROOMS AND CLOSETS Nailed between studs, blocking provides solid backing for items such as towel racks, closet shelves, and safety grabs bars. Blocking ensures that the mounting hardware for those devices can be anchored with screws driven into solid wood, so that you don’t have to worry about racks, bars, and shelves pulling loose. It’s smart to include blocking when marking up wall plates. Cut blocking boards from 2× scraps. Blocking is installed so that the face of the 2× is flush with the edges of the studs. To help locate blocking, use these standard heights for common bath, kitchen, and storage fixtures. Towel bars: Near the tub and vanity, center blocks 54 in. above the floor.Toilet-paper holder: Near the toilet, centre blocks 24 in. above the floor.Toothbrush and soap holder: Above the sink, center blocks 40 in. above the floor.Safety grab bars: Near the toilet and near (or in) the bathtub/shower, center blocks 36 in. above the floor.Closet shelf and pole: Block 66 in. above the floor; more blocking may be needed if you install wire shelves.Linen-Closet shelves: First block above the floor at 20 in., then block every 14 in, thereafter for above-floor measurements of 34 in., 48in, 62in., and 76 in. Don’t forget to block for a shelf or two in the utility room to hold detergent and other laundry items.Kitchen cabinets: Block below 36 in. for base cabinets, above 54 in. and below 84 in. for wall cabinets.Shutters: Block at the top and bottom of windows at least 12 in. wide.
Proper drainage around House
Proper drainage around House This article is an excerpt from the book called “How to build a house” by “Larry Haun”. This gives a guidelines to keep the water away from the foundation. ENSURING PROPER DRAINAGE We need water , We just don’t need it in our basements or under our floors, causing dampness, mold, and rot. We may not be able to hold back the Mississippi when it floods, but we can control most of the rainwater falls around our homes. Follow the guidelines below and you’ll stand a good chance of keeping water on the outside of your foundation. Don’t build on the lowest part of the lot.Seal all holes around the pipes that go through the concrete.Install perforated drainpipes at the bottom of the concrete footings around the outside of the foundation.Coat the foundation walls with a suitable damp-proofing or waterproofing treatment. Check with builders in your area or the local building department to find out which foundation coatings are recommended. Tar coatings are expensive but not as effective as more recently developed waterproofing treatments.Compact loose fill as you backfill around the foundation, but be careful, because excessive compaction can damage masonry walls. Make sure that the finished grade (ground level) slopes away from the foundation. But remember that loose fill can settle. A finished grade that slopes away from the house may later slope toward the house should settling occur.Use gutters and downspouts to manage high roof water runoff. Make sure you keep gutters unclogged and install down spouts to direct water away from the house.Get advice from your building department. The time to protect your house from water infiltration is while you are building. Fixing a leaky basement or a damp crawl space after the house has been built can be very expensive.
Cost of Building Basement
Cost of Building Basement Cost of building a basement could vary based on various factors. This article is an excerpt from the book called “How to build your own TINY HOUSE” by “Roger Marshall”. This helps in estimating the cost of a sample basement project. Please leverage this to calculate your DIY home renovation projects. CALCULATING THE COST OF STRUCTURE 1.If the hose has a slab or basement(let’s say the footprint is 20ft. × 25 ft.), in either case you will lay insulation on top of the wall and place a pressure-treated (PT) 2×8 sill plate all around the edge. That amounts to: 25ft.×2 + 20 ft. ×2, Which comes to 90 ft. of PT 2×8. If you have a basement, you will need two 20 ft.-long beams that will run across the basement and support the floor joists. These beams will be 5 1/8 in., or you can use smaller beams with a single post in the middle of the basement floor.If you have a slab in a warm climate, you can simply tile over the concrete. In a cold climate, you might want to lay a moisture barrier, and then put 2×4s inside the sill plate. You can lay foam insulation between the 2×4s and cover the entire structure with 3/8- in plywood.Separate the floors, walls, and roof. Each wall will be made up of studs, headers, and top and bottom plates. Count the number of studs and the total linear footage of the headers and plates and multiply by the cost per item to come up with a price. Add in the wall covering (such as Tyvek ) and then calculate the total wall area to find out how much sheathing you will need.The floor is made of 10-ft.-long 2×8s resting on the walls and the transverse joists. Count the number of floor joists you will need and price them.The roof should also be priced out by breaking it into its component parts (rafters, joists, sheathing, and roof covering).You will need to add nails or screws, caulking, and possibly glue.Count the exterior door(s) and price each one. Then count the interior doors and price them.Count the windows and price them out.When all is done, add in at least 10% or so. You will usually not busy all the materials at the same time and prices may fluctuate.
Proper drainage around House
Proper drainage around House This article is an excerpt from the book called “How to build a house” by “Larry Haun”. This gives a guidelines to keep the water away from the foundation. ENSURING PROPER DRAINAGE We need water , We just don’t need it in our basements or under our floors, causing dampness, mold, and rot. We may not be able to hold back the Mississippi when it floods, but we can control most of the rainwater falls around our homes. Follow the guidelines below and you’ll stand a good chance of keeping water on the outside of your foundation. Don’t build on the lowest part of the lot.Seal all holes around the pipes that go through the concrete.Install perforated drainpipes at the bottom of the concrete footings around the outside of the foundation.Coat the foundation walls with a suitable damp-proofing or waterproofing treatment. Check with builders in your area or the local building department to find out which foundation coatings are recommended. Tar coatings are expensive but not as effective as more recently developed waterproofing treatments.Compact loose fill as you backfill around the foundation, but be careful, because excessive compaction can damage masonry walls. Make sure that the finished grade (ground level) slopes away from the foundation. But remember that loose fill can settle. A finished grade that slopes away from the house may later slope toward the house should settling occur.Use gutters and downspouts to manage high roof water runoff. Make sure you keep gutters unclogged and install down spouts to direct water away from the house.Get advice from your building department. The time to protect your house from water infiltration is while you are building. Fixing a leaky basement or a damp crawl space after the house has been built can be very expensive.
Electrical Work
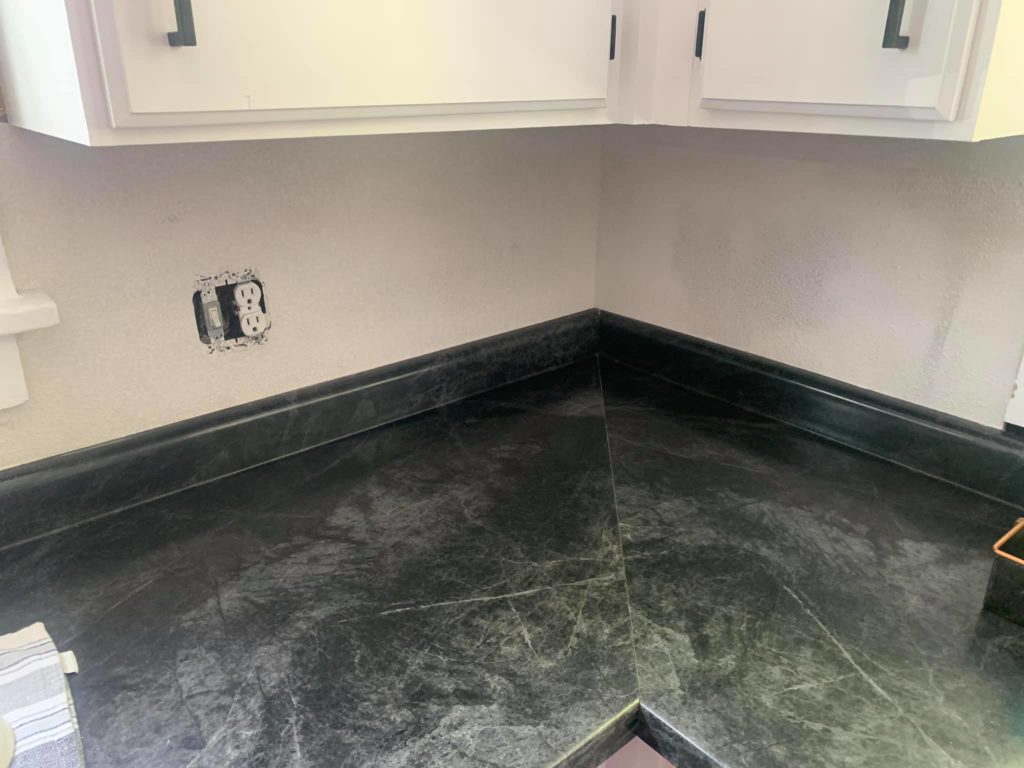
Electrical Work This guide to your DIY home projects, electrical work. This article is an excerpt from the book called “How to build your own TINY HOUSE” by “Roger Marshall”. Please leave a positive comment in the comments section, if you like the articles 10 Pointers To Guide Your Electrical Decisions Use LED lighting throughout to cut down on power usage.Use Energy Star appliances wherever possible.Receptacles can be located at any height comfortable for the design, though typical height is at least 12 in. to 15 in. off the finished floor.If you plan on installing outlet boxes above countertops, they should be 9 in. to 12 in. above the countertop.When locating light fixtures overhead, make sure they are not in a hallway where the fixture might bang heads, but that they properly illuminate the walkway.All outdoor boxes or boxes in wet areas should be waterproof and have a ground fault circuit interrupter (GFCI) breaker or receptacle.Check with your local authority to make sure you are using the correct style of outlet box. Some authorities specify metal only, whereas others allow plastic boxes.Use the appropriately shaped box. Outlets and switches use a 23/4- in. × 4 1/2 in. square box, whereas lighting outlets tend to use 6-in. round boxes in the ceiling. Note that many recessed lighting fixtures come with their own box. You should decide what you need before start the rough wiring installation to avoid multiple trips to the hardware store.Make sure to specify the shortest distance between the outlet box and the main panel and to size the wire suitably for the circuit.If you are planning to run two appliances at the same time- for example, you might run the coffee machine and the toaster at the same time while you have your computer and monitor plugged in- it’s best to put them on different circuits rather than plug them all into one outlet.
Sound Insulation Walls
How to create sound insulation walls?. Find answers to your question below. This article is an excerpt from the book called “Stanley Complete DRYWALL” by “Des Moines Iowa”. Thanks to the author. CREATING SOUND CONTROL AND FIREWALLS The irony of successfully decreasing sound transmission is that a room becomes more acoustically reflective. So you’ll probably need to consider adding some sound-absorbing materials such as carpeting and drapes. Consult with your local building officials before building a firewall to ensure that you utilize the correct materials and framing techniques. INSTALL A SOUND-REDUCTION BOARD A special type of wall panel is engineered to serve as the base layer instead of drywall in a two-layer sound-reduction installation.(One brand is Homasote 440 Sound Barrier Panel). Following the manufacturer’s instructions, install the panels vertically to wood or metal studs, using adhesive and screws. Top it with adhesive and No.10×1 ½- inch type G screws driven into the base panel, not the studs. Call Us @ (202) 280-2569 Continue reading about “Demountable Partitions“
Demountable Partitions
Washington Monument This article is about Demountable Partititons, which is an advanced topic when it comes to drywall projects. This articles in an excerpt from the book called “DRYWALL” by “W Robert Harris”, Please read , thank the author and leave a comment. A demountable partition is a partition designed to be assembled, disassembled, and reassembled in another location with minimal damage to the partition components. Partitions of this type are most commonly used in office buildings where space requirements frequently change. Unlike standard metal stud and drywall partitions, which must be disposed of when removed, demountable partitions can be easily relocated with minimal waste? The salvage rating signifies the percentage of partition components that are reusable when the demountable partition system is relocated. A demountable partition’s salvage rating may be the determining factor when a building owner selects the type to be used. A partition with a high salvage rating may be more expensive initially; however, when the cost of the components destroyed when it is moved from one location to another is factored in, it may cost less. For example, a demountable partition with a high salvage rating that is moved from the third floor to the second floor within the same building will require a minimum number of new components. This reduces the high cost of material delivery and stocking when access is poor. All demountable partitions, regardless of the manufacturer, are designed to divide space. Most utilize tracks or runners at the top and bottom, studs, and drywall sheets or prefinished panels that conceal the framing. Some demountable partitions use clips that hang the panels on the studs. Others require screws for attaching the panels to the studs and rely on battens to cover the screws at the joints. There are progressive systems in which interlocking sandwich panels are started at one side of the room. Additional panels are added as the installation progresses to the opposite end. (202) 280-2569 Washington Monument Regardless of the manufacturer or the type of system used, seven basic rules should be followed when installing demountable partitions: Be sure that the partition layout has been completed before the panels are stocked in the room where they will be installed. Demountable partitions are usually installed in finished rooms and material storage space may be limited. Repeated moving of prefinished panels increases the potential for damage.Double-check the layout before fastening the tracks to the floor. Damaged carpets or floor tile caused by improperly located floor tracks may be impossible to repair.Take all measurements and make all cuts accurately. Most demountable partitions use a top track component that is a finished member with no additional trim at the ceiling. Poorly-fitting corners and track joints are unacceptable and costly to correctInstall all framing members correctly. Accurate layout of the studs is very important since the prefinished panels should not be cut.Handle the panels carefully to avoid damaging the panel faces and edged. The finished appearance of the partition is directly affected by the condition of the panels.Be sure all door and window frames are installed correctly (plumb, true, and securely fastened to the framing).Exercise care when removing unused material or scrap from finished rooms.